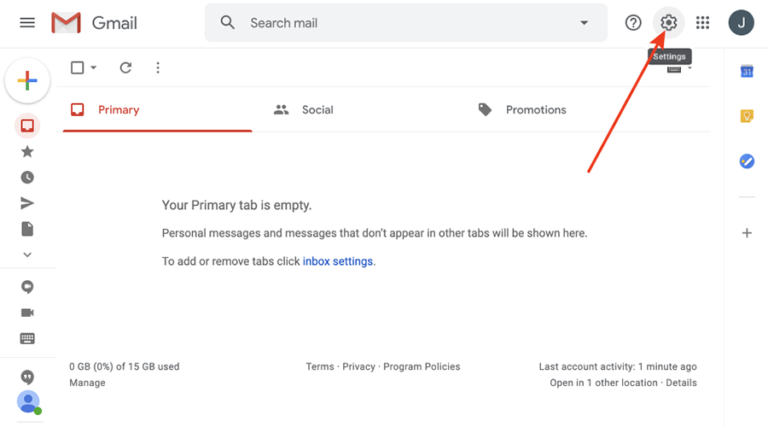
Step 1: Open a web browser window and log in to your Gmail account. Click on the gear icon to open up your settings.
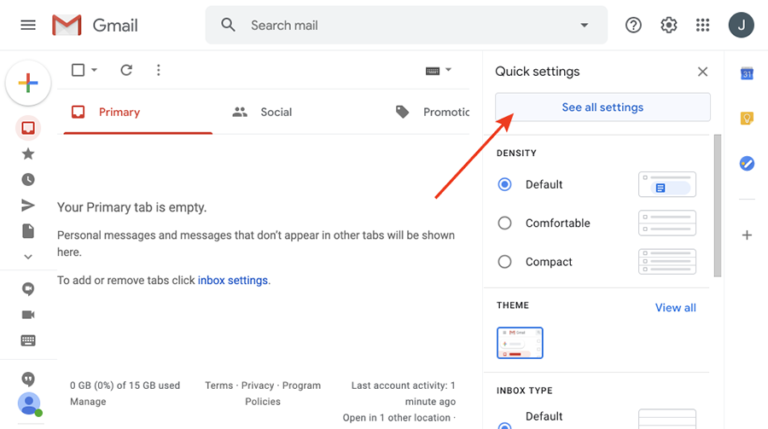
Step 2: Click See all settings to open up additional options.
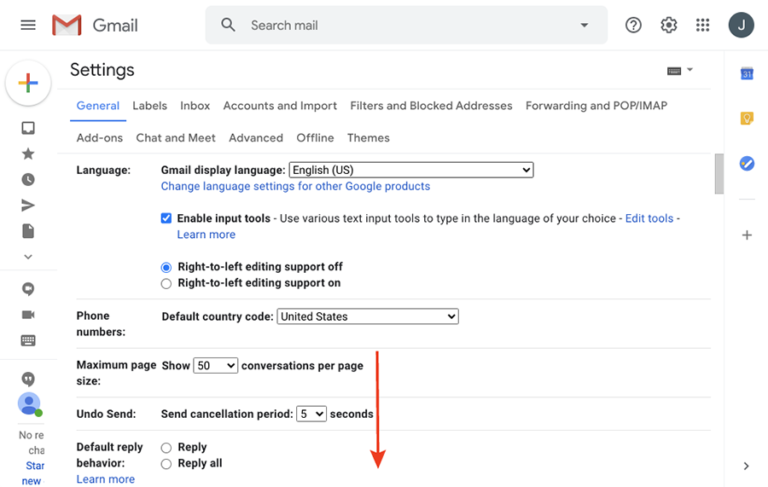
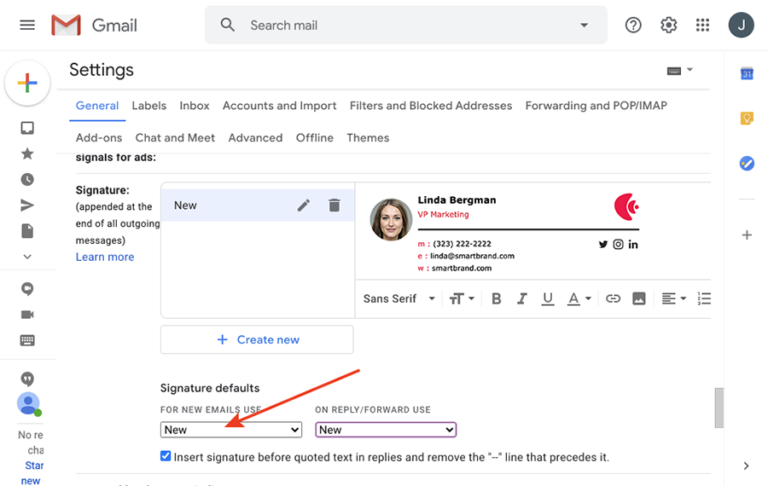
Step 3: Scroll down in the General tab to the bottom until you see the Signature setting
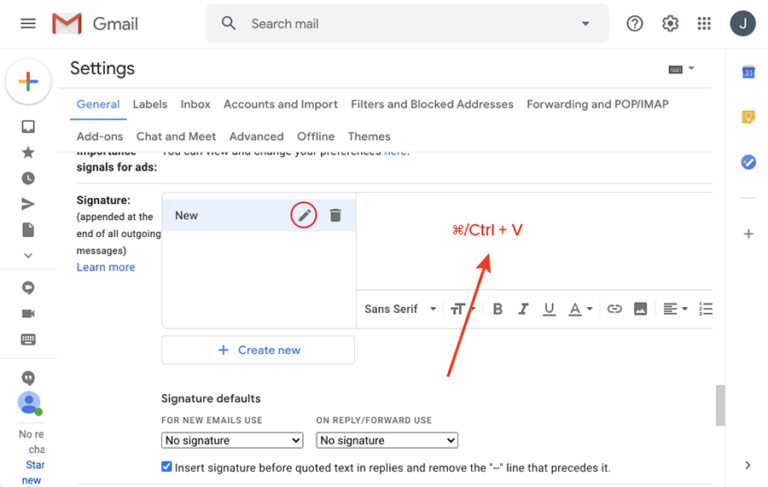
Step 4: To change an existing Gmail signature, copy your personalized email signature and paste it into the text field. (Control+V on a PC, or Command+V on a Mac).
Step 5: To set your new signature as your default, click the dropdown menu and select your signature name. If you want your signature to appear every time you reply to or forward an email, select it in the second dropdown menu.
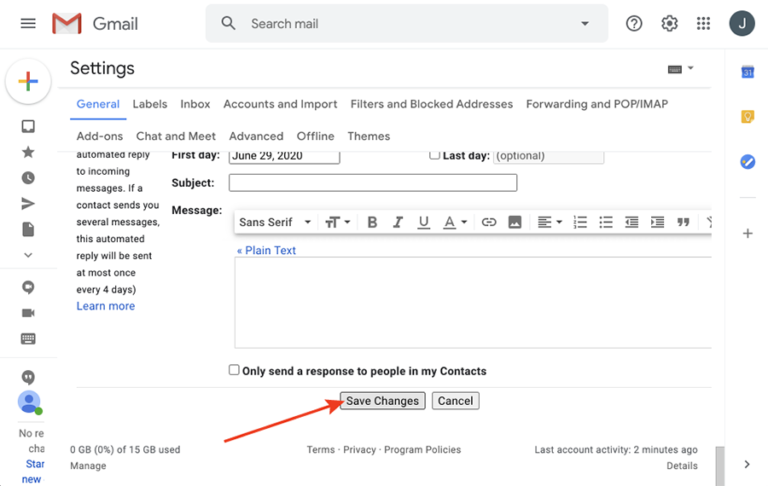
Step 6: The last step is to scroll all the way to the bottom again and make sure you click the Save Changes button.