User Guide - Apple Mail

How to add your signature to Apple Mail
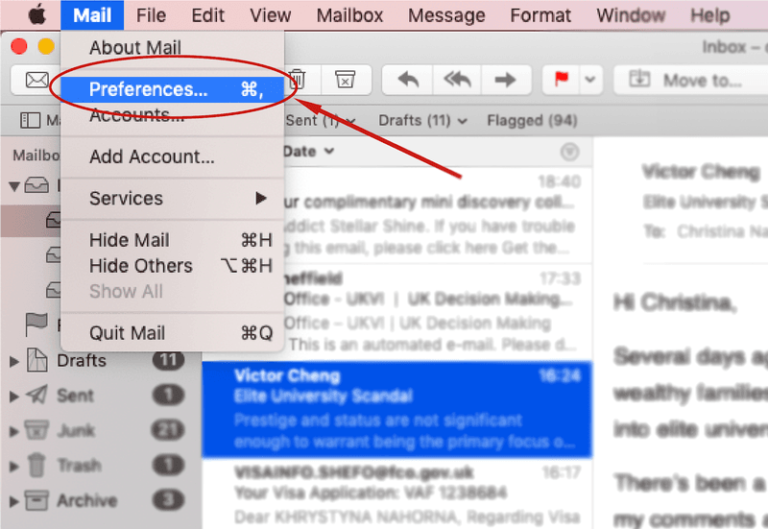
Step 1: Open the Apple Mail application, move the mouse over ‘Mail’ in the top menu and select ‘Preferences’.

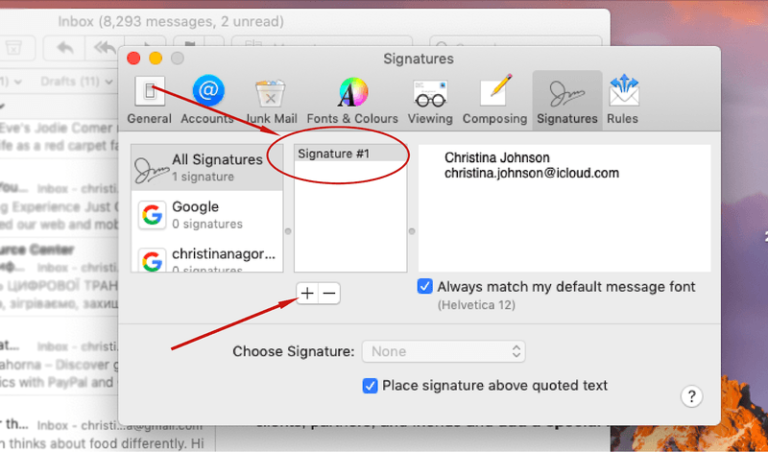
Step 2: In the opened pop-up window, go to the ‘Signatures’ tab and choose the account you wish to create the signature in. Click on the ‘+’ button to create one.
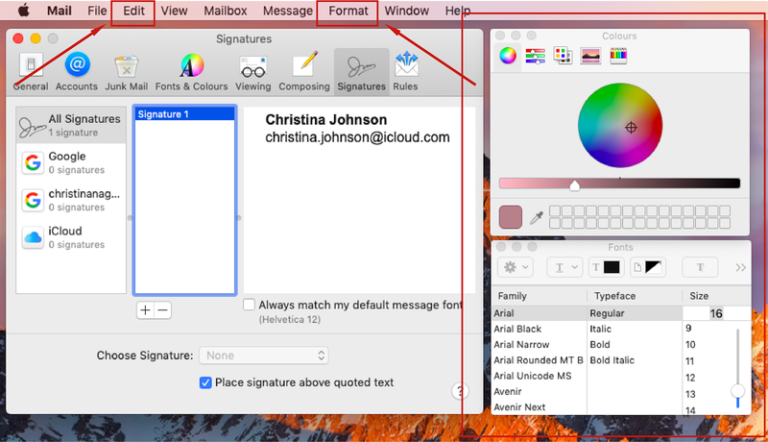
Step 3: You can change the name for the signature in the middle column. There is an editing space in the right column where you can design your signature or insert an externally generated one.

Step 4: Once you have designed an Apple email signature with GenieSign, just copy it from the dashboard and insert it into the right column.

